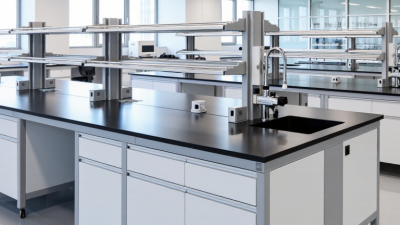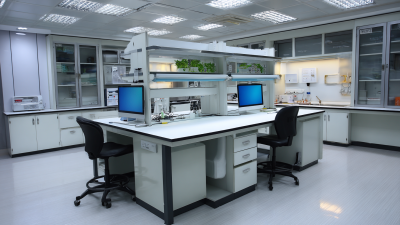
A Lab Bench is more than a flat work surface. It must suit the tasks, equipment, and people using it every day. The U.S. Environmental Protection Agency and Department of Energy’s Labs21 program reports that laboratories can use five to ten times more energy per square foot than typical office buildings. That figure makes one point clear: laboratory choices affect more than appearance. A bench’s materials, layout, and utility access can shape cleaning routines, workflow, and long-term operating needs.
Laboratory safety expert James A. Kaufman, founder of the Laboratory Safety Institute, has emphasized the importance of making safety part of everyday laboratory practice. That principle is a useful lens for choosing a bench: consider spill response, chemical compatibility, stable equipment placement, and comfortable working height before comparing finishes. Small details matter. A sink placed too far away can complicate cleanup; a crowded surface can leave less room for careful work.
The National Research Council’s Prudent Practices in the Laboratory also treats facility design and work practices as connected parts of laboratory safety. Use that guidance alongside your own task list, room measurements, and equipment specifications. This guide’s seven tips will help you assess the details that catalogs cannot resolve, from load capacity to storage and future flexibility. No bench fits every lab. And the right choice may require a second look.

Before choosing a lab bench, define the tasks it must support. List routine activities such as weighing samples, preparing solutions, using instruments, or cleaning equipment. Each task affects the required surface, storage, and utilities. For example, a balance needs a stable area away from frequent movement. A sink or power outlet should sit where it supports the workflow without blocking access. Check chemical, heat, and load requirements against reliable product specifications.
Tips: Sketch the bench area and mark equipment, outlets, sinks, and walking paths. Note which tasks happen together, and keep frequently used tools within easy reach. Allow room for cleaning and maintenance. Small details matter.
Then consider how people move through the room. A bench that fits on paper may feel crowded once stools, carts, and open drawers are added. Think about who shares the space and whether work needs clear separation. I would revisit the layout after listing real tasks; the first plan can miss awkward steps. A short walkthrough with laboratory users may reveal conflicts, such as a door striking a cart or cables crossing a work surface. Choose a setup that supports the actual routine, not an idealized one.

A lab bench surface should match the chemicals used every day, not just look durable in a catalog. Epoxy resin often suits wet work and frequent cleaning, while stainless steel is useful where a smooth, nonporous surface matters. Neither material is universally resistant. Strong acids, solvents, heat, or concentrated disinfectants can affect surfaces differently.
Check compatibility data for the exact chemicals and cleaning agents in your lab. A quick wipe with diluted detergent is not the same as repeated exposure to a solvent or bleach. Small details matter. Look at seams, edges, sink cutouts, and areas around taps, where liquid can collect or seep beneath the surface. Scratches and chipped coatings can also make cleaning less reliable.
I would not choose a bench from a broad label like “chemical resistant” alone. Ask for written resistance information, including exposure time and temperature, then compare it with your cleaning routine. For example, a surface that handles brief splashes may not tolerate a spill left overnight. That distinction is easy to miss. If test methods or limits are unclear, pause and ask the supplier or your lab safety specialist before ordering. A slightly imperfect choice can be manageable, but only if staff know its limits and clean spills promptly.
A lab bench should fit the people who use it, not just the room. Measure work height with the main task in mind: microscope work often benefits from a seated position, while frequent handling may suit standing or adjustable-height work. Check elbow posture with the actual chair and footwear. A few centimeters can change comfort over a long shift.
Equipment sets the bench’s depth and load needs. Measure instrument footprints, including cables, ventilation gaps, and doors that swing open. Keep controls within easy reach; placing a monitor at the back may force repeated leaning. Leave clear surface space for sample preparation, too. It is easy to underestimate this area when planning from equipment dimensions alone. I have seen neat layouts become awkward once notebooks and small tools arrive.
Room space matters just as much. Mark the proposed footprint with tape, then test drawer access, chair movement, and walking routes. Allow room for cleaning and routine maintenance. Check doorways and elevators before ordering; a bench that fits the room may not fit the route inside. Leave enough clearance around utilities, and confirm requirements with facilities staff. Measure twice. Real rooms have surprises.
Choosing a lab bench starts with the load it must support. Add the weight of instruments, samples, and supplies, then consider how that weight sits across the worktop. A centrifuge or other heavy device can create a concentrated load, even when the bench’s total capacity looks adequate. Check the manufacturer’s rated capacity and confirm whether it applies to evenly distributed weight. Plan for the real load. If equipment may change, leave a reasonable margin rather than choosing a bench that barely meets today’s needs.
Storage should support daily work, not simply fill empty space. Drawers can keep small tools close, while open shelves may suit larger containers. Check that doors and drawers can open without blocking walkways or nearby equipment. Also confirm the floor can support the loaded bench, especially when several heavy units will sit together. I have found that storage plans often look tidy on paper but feel cramped once cables and equipment arrive. Measure twice.
Tip: List every planned utility before ordering: electrical outlets, data connections, sinks, and any required service lines. Note their locations and confirm the bench can accommodate them safely. Leave access for maintenance, and ask a qualified facilities professional to verify connections and clearances. A neat bench is useful; a bench that fits the room’s actual services is better.
| Tip | What to Assess | Planning Data or Check | Why It Matters |
|---|---|---|---|
| 1 | Check load capacity | List the combined weight of equipment, samples, and supplies. Compare it with the bench’s rated load, checking whether the rating is for a uniformly distributed load or a concentrated load. | Equipment placed in one small area can create a different load from the same weight spread across the worktop. Use the manufacturer’s rating and include an appropriate safety margin. |
| 2 | Choose suitable dimensions | Common planning dimensions are approximately 600–750 mm deep. Seated work surfaces are often around 730–760 mm high; standing work surfaces are often around 900 mm high. | These are starting points, not universal standards. Confirm the dimensions against the task, user, equipment footprint, accessibility needs, and available room space. |
| 3 | Plan storage around workflow | Count the items that need storage and note their sizes, weights, and frequency of use. Reserve drawers for smaller items and shelves or cabinets for larger supplies. | Keeping frequently used materials within easy reach can reduce unnecessary movement. Confirm that doors and drawers will not obstruct aisles or other work areas. |
| 4 | Map utility requirements | Mark the location and quantity of required electrical outlets, data connections, water, drainage, gas, or other approved services before selecting the bench. | Utility locations affect bench placement and installation. Confirm service compatibility, required clearances, and applicable building and laboratory safety requirements. |
| 5 | Match the worktop to the task | Identify routine exposure to chemicals, heat, moisture, abrasion, or impact, then check the worktop material’s documented resistance to those conditions. | No single surface suits every laboratory task. Check compatibility with the specific chemicals and procedures used, and follow the supplier’s care and cleaning guidance. |
| 6 | Allow for access and movement | Measure the room, doorways, equipment, and circulation routes. A 900–1,200 mm aisle is a useful early planning range, subject to local codes and accessibility requirements. | Clearances influence safe movement, equipment access, and installation. Verify the final layout against applicable regulations and the needs of the people using the lab. |
| 7 | Consider adjustment and future changes | Check whether the bench can be leveled or height-adjusted, and whether its modules, shelves, or service connections can accommodate planned equipment changes. | Adjustability and modular components can help the setup adapt to changing workflows. Confirm stability, load ratings, and service requirements for any reconfigured layout. |
Note: Dimensions shown are general planning references, not specifications for a particular product. Confirm load ratings, material compatibility, installation details, and local code requirements before purchase.
A lab bench should match the hazards and cleaning routine of its workspace, not just its floor plan. Check for rounded edges, stable feet, and surfaces that resist the chemicals used in daily work. The CDC and NIH’s Biosafety in Microbiological and Biomedical Laboratories, 6th edition, emphasizes decontaminating work surfaces after spills and at the end of work. A seamless, nonporous top can make that task easier, but only if its joints and sink edges are also accessible.
Small details matter.
Compare materials under real conditions. Ask suppliers for chemical-resistance data, load ratings, and guidance on scratches, heat, and repeated disinfectant exposure. The U.S. Bureau of Labor Statistics reported 2.6 million nonfatal workplace injuries and illnesses in private industry for 2023, a broad figure that is not specific to laboratories. It still underscores why stable construction and clear, uncluttered work areas deserve attention.
For maintenance, inspect seams, fasteners, and adjustable feet on a schedule; a loose joint can collect residue and become harder to clean.
Check the joints.
A lower purchase price may seem sensible, yet frequent repairs or difficult cleaning can erase the savings. The right choice is not always obvious, so weigh documented performance against the actual workload and cleaning products used in your lab.